How to create online games / Unreal Engine 4 tutorial series
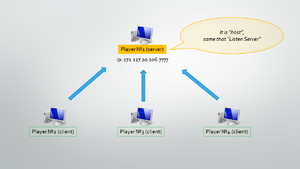
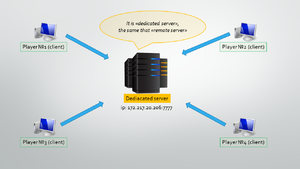
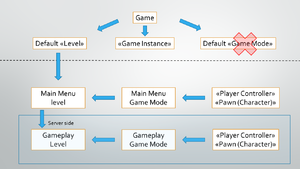
- Difference between listen and dedicated servers
- Create third person template project v 4.24 by next technical task
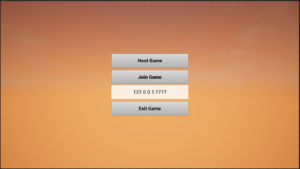
- To create game (host) click on the "Host Game" button, it call "Open Level" function with the Gameplay map name and "listen" option.
- To connect to the host write it IP-adress and click the "Join Game" button. It call "Open Level" function with IP-adress as map name.
#2 - Create remote (dedicated) server
- Learn to works with application arguments. Create simple C# app and print on screen arguments. Form shortcut and .bat files.
static void Main(string[] args)
{
     foreach (var item in args)
     {
          Console.WriteLine(item);
     }
     Console.ReadKey();
}
- Modify game project. Remove "Host Game" button from main menu. Define Server Default Map in the project settings.
- Create two .bat files to start game and dedicated server.
StartGame.bat
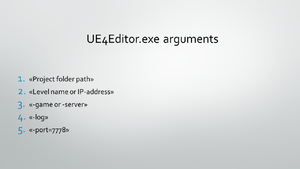
"C:\UE4_4.24.3_S\Engine\Binaries\Win64\UE4Editor.exe" "I:\OnlineGame3\OnlineGame.uproject" -game
StartServer.bat
"C:\UE4_4.24.3_S\Engine\Binaries\Win64\UE4Editor.exe" "I:\OnlineGame3\OnlineGame.uproject" -server -log -port=7778
- Build independent dedicated server
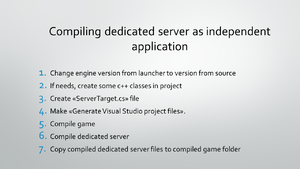
1. Change engine version from launcher to version from source
2. If needs, create some c++ classes in project
3. Create «[projectName]Server.Target.cs» file in the "Source" project folder
using UnrealBuildTool;
using System.Collections.Generic;

public class [projectName]ServerTarget : TargetRules
{
	public [projectName]ServerTarget(TargetInfo Target) : base(Target)
	{
		Type = TargetType.Server;
		DefaultBuildSettings = BuildSettingsVersion.V2;

		ExtraModuleNames.AddRange( new string[] { "[projectName]" } );
	}
}
4. Make «Generate Visual Studio project files».
5. Compile game
6. Compile dedicated server
7. Copy compiled dedicated server files to compiled game folder
projectNameServer.exe, projectNameServer.exp, projectNameServer.lib
from
projectFolder/Binaries/Win64
to
compiledGameFolder/projectName/Binaries/Win64
#3 - Recreate project on new 4.26 version with c++ based architecture and new clean folder structure
- Discuss about required Visual Studio and workloads version importance
- Recreate old or create new 4.26 version project
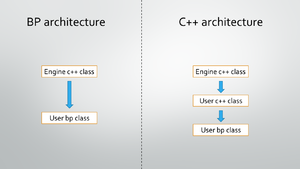
- Creating blueprint class inherited from custom c++ class
- Change blueprint parent class
- Recreate previous project with cpp based architecture and new clean folder structure
#4 - Git
#5 - Overview the course plan, what we want to create. Required skills and technologies stack.
- Сourse plan as game features
- Web-Site with registration, authorization and download game client link.
- Join game via registered login and password.
- Opportunity to create your own custom character (race, gender, ect.).
- Getting your created character list.
- Impossibility to create two characters with the same NickName.
- Deleting characters.
- Join game server with selected character.
- Impossibility to join server twice with same account in one time.
- Display character nickname over character head.
- Saving characters data like location, inventory, ect.
- In-game chat for all players.
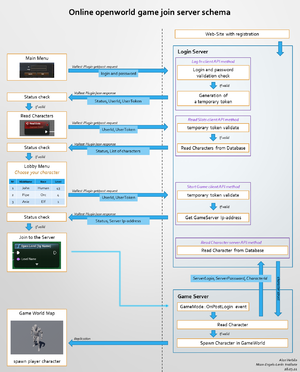
- Join server schema
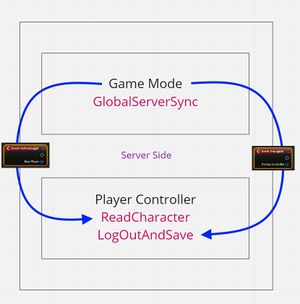
- Game-server methods
- All LoginServer Methods
Client safe methods:
Log In ( Send: login, pass, GameClientVersion. Receive: Status, UserId, UserToken. )
Log Out ( Send: UserId, UserToken. Recieve: Status. )
Read Slots ( Send: UserId, UserToken. Recieve: Status, List of characters. )
Create Character ( Send: UserId, UserToken, NickName, Race, Gender. Recieve: Status. )
Delete Chatacter ( Send: UserId, UserToken, CharacterId. Recieve: Status. )
Start Game ( Send: UserId, UserToken. Recieve: Status, ServerIp. )
Server only methods:
Read Character ( Send: ServerLogin, ServerPassword, CharacterId. Recieve: Status, Character. )
GlobalServerSync ( Send: ServerLogin, ServerPassword, SyncData. Recieve: Status, SyncData. )
Log Out And Save ( Send: ServerLogin, ServerPassword, Character. Recieve: Status. )
SyncData
{
List<Characters> Characters;
List<String> MustBeLogOutedUserIds;
}
MustBeLogOutedUserIds
{
Game Server to Login Server:
Users which was no safe disconnected, without LogOut method calls.
They are currently offline, but they cannot logIn anymore, cause in database they are still isOnline = true.
Method must set isOnline = false for all this users in database.
Login Server to Game Server:
Users which try to logIn with currently online accounts.
Game server must forced kick this users from game server and put them to MustBeLogOutedUserIds queue like non safe disconnected;
}
- Required skills:
- Unreal Engine - intermediate.
- C# language - intermediate.
- Microsoft Asp.Net - basics.
- Technologies stack:
- Unreal engine
- VaRest Unreal Engine plugin
- Asp.Net Core mvc + web api
- Asp.Net Core Entity Framework
- Asp.Net Core Identity
- Microsoft SQL Server
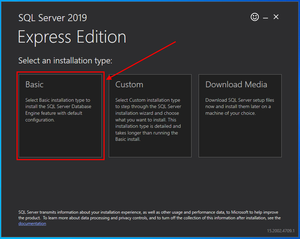
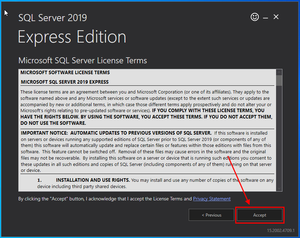
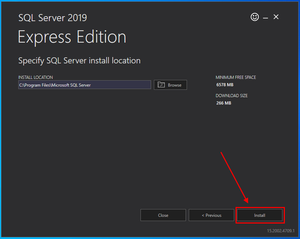
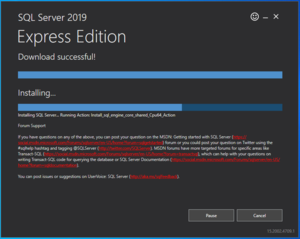
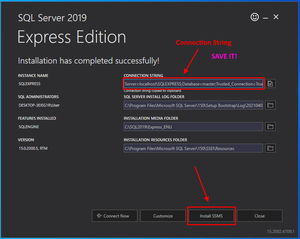
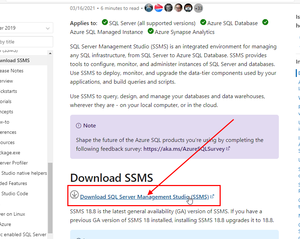
#6 - Install Microsoft SQL Server and SQL Server Management Studio. Create an empty ASP.NET Core project.
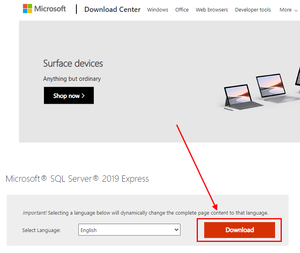
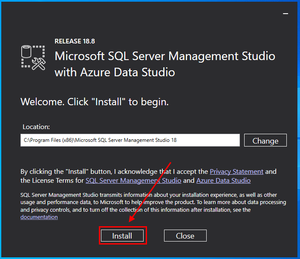
- Install MSSQL Server and SQL Server Management Studio.
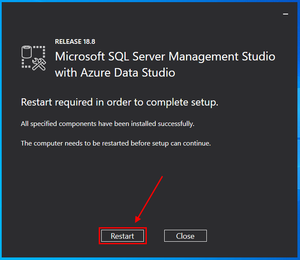
SQL Server installed, then lets install SQL Server Management Studio
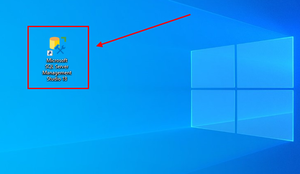
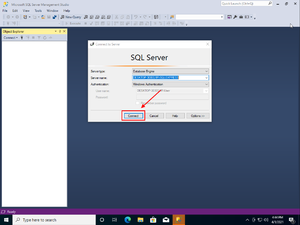
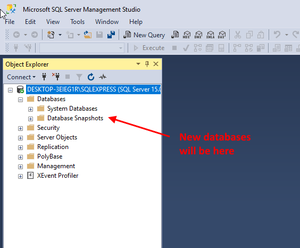
MSSQL Server and SQL Server Management Studio are successfully installed
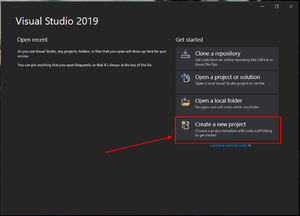
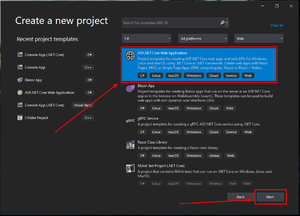
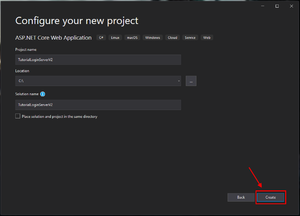
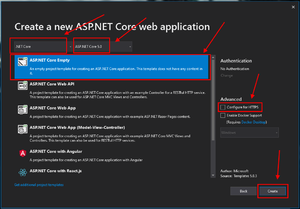
- Create an empty ASP.NET Core project.
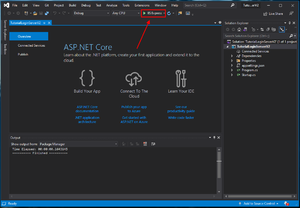
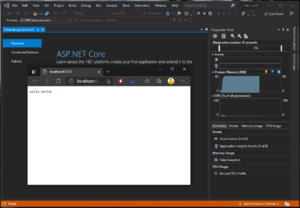
An empty ASP.NET Core project is created.
#7 - Install all NuGet packages we need and required client side libraries.
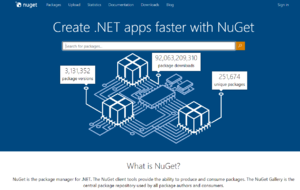
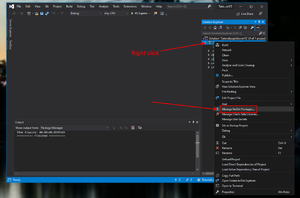
- Install all NuGet packages we need
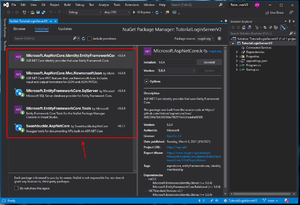
Reqired NuGet packages:
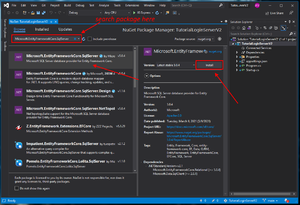
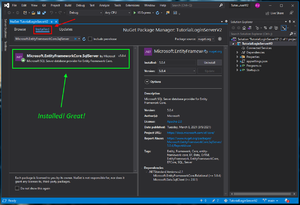
- Microsoft.EntityFrameworkCore.SqlServer - Entity Framework ORM system with SqlServer adapter to connect to MSSQL Server we installed in previous tutorial;
- Microsoft.EntityFrameworkCore.Tools - Entity Framework Tools for automatic database creation based on code first approach;
- Microsoft.AspNetCore.Identity.EntityFrameworkCore - Identity library for user registration, authentication and roles;
- Microsoft.AspNetCore.Mvc.NewtonsoftJson - Library that gives us ability to serialize advanced JSON requests;
- Swashbuckle.AspNetCore - Swagger. Great tool for testing and documenting web API.
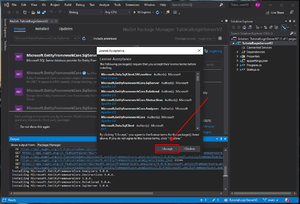
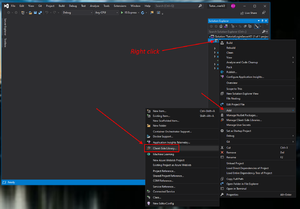
Then we need to install other required NuGet packages
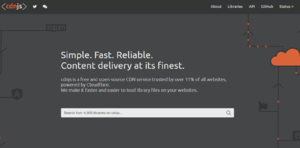
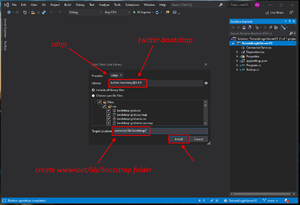
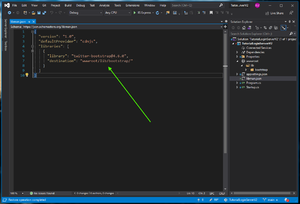
- Install required client side libraries from "cdnjs"
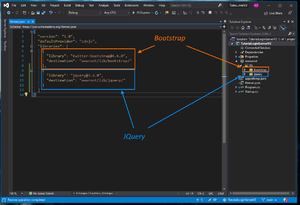
Required client side libraries:
- twitter-bootstrap - for basic web site design
- jquery - just for case
Then we need to install JQuery as the last one library
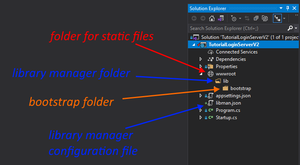
libman.json:
{
  "version": "1.0",
  "defaultProvider": "cdnjs",
  "libraries": [
    {
      "library": "twitter-bootstrap@4.6.0",
      "destination": "wwwroot/lib/bootstrap/"
    },
    {
      "library": "jquery@3.6.0",
      "destination": "wwwroot/lib/jquery/"
    }
  ]
}
Done.
#8 - Setup appsettings.json, create LoginServer folder structures and entity models
- Setup appsettings.json
appsettings.json file is ASP.NET Core app configuration file where we can store our variables instead of hardcode it. By default it seems like this:
{
  "Logging": {
    "LogLevel": {
      "Default": "Information",
      "Microsoft": "Warning",
      "Microsoft.Hosting.Lifetime": "Information"
    }
  },
  "AllowedHosts": "*"
}
But we need to place in it
- Database connection string
- Unreal Engine dedicated gameplay server IP address
- Game client version
Now our appsettings.json file must seems like this:
{
  "ConnectionStrings": {
    "DefaultConnection": "Server=localhost\\SQLEXPRESS;Database=testDB;Trusted_Connection=True;"
  },
  "GameServerIPs": {
    "DefaultServer": "127.0.0.1:7777"
  },
  "GameClienVersions": {
    "Current": "1"
  },
  "Logging": {
    "LogLevel": {
      "Default": "Information",
      "Microsoft": "Warning",
      "Microsoft.Hosting.Lifetime": "Information"
    }
  },
  "AllowedHosts": "*"
}
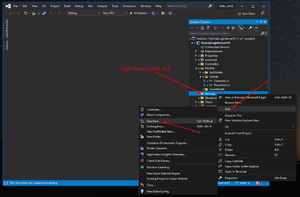
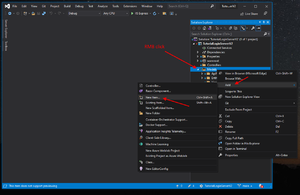
- Create folder structures
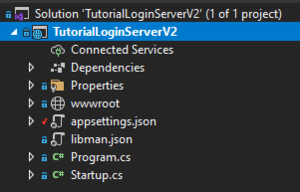
Now we have next folders:
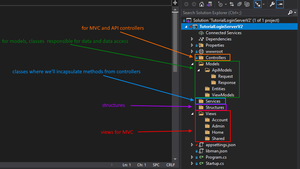
But we need to create next folders:
- Create entity models
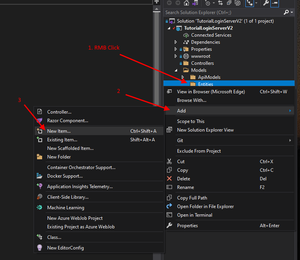
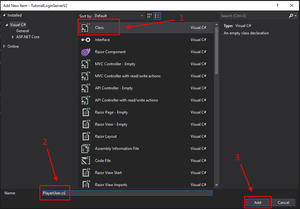
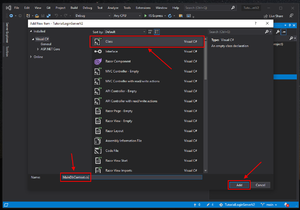
We need to create two model classes PlayerUser.cs and Character.cs
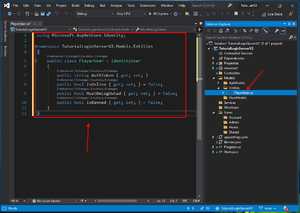
Lets create PlayerUser.cs file in the Models/Entities folder first:
PlayerUser.cs:
using Microsoft.AspNetCore.Identity;

namespace TutorialLoginServerV2.Models.Entities
{
    public class PlayerUser : IdentityUser
    {
        public string AuthToken { get; set; }
        public bool IsOnline { get; set; } = false;
        public bool MustBeLogOuted { get; set; } = false;
        public bool IsBanned { get; set; } = false;
    }
}
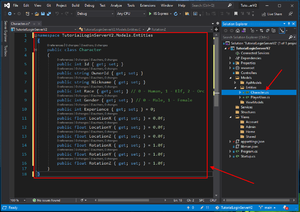
Next we need to create last one Character.cs model class in the Models/Entities folder
Character.cs:
namespace TutorialLoginServerV2.Models.Entities
{
    public class Character
    {
        public int Id { get; set; }
        public string OwnerId { get; set; }
        public string Nickname { get; set; }
        public int Race { get; set; } // 0 - Human, 1 - Elf, 2 - Orc
        public int Gender { get; set; } // 0 - Male, 1 - Female
        public int Experiance { get; set; } = 0;
        public float LocationX { get; set; } = 0.0f;
        public float LocationY { get; set; } = 0.0f;
        public float LocationZ { get; set; } = 0.0f;
        public float RotationX { get; set; } = 1.0f;
        public float RotationY { get; set; } = 1.0f;
        public float RotationZ { get; set; } = 1.0f;
    }
}
Done.
#9 - Create empty EngineManager class and MainDbContext class
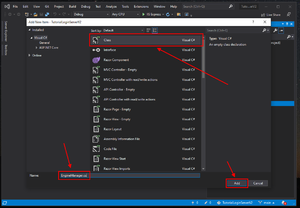
- Create empty EngineManager class
In the last episode we created the "Services" folder for the EngineManager module.
The EngineManager is not necessarily needed, but we will use it for incapsulating parts of the controllers classes and and creating most clean code.
The EngineManager will be included in the dependency injection technique as singleton.
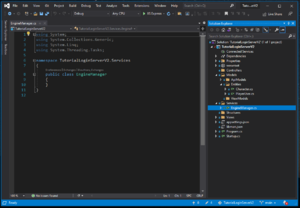
Today we just create the empty EngineManager class inside of the "Services" folder.
using System;
using System.Collections.Generic;
using System.Linq;
using System.Threading.Tasks;

namespace TutorialLoginServerV2.Services
{
    public class EngineManager
    {
    }
}
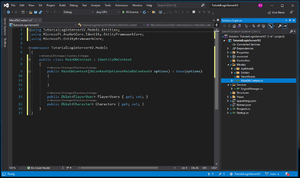
- Create MainDbContext class
The Database Context Class (DbContext for short) is part of imported before Entity Framework Core ORM system.
This class is representing our database as simple c# object.
Inside of it we will store our entity classes like PlayerUser.cs and Character.cs as array variables. Not standard array but specific DbSet collection.
In future we will do the specific "migration" operation and in our Microsoft SQL Server Database will be automaticly created tables based on our entity DbSet variables.
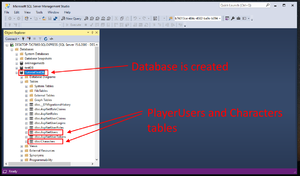
DbSet<PlayerUser> variable will create PlayerUser table and DbSet<Character> variable will create Characters table.
When we ended our setup we will have the opportunity to Create, Read, Update and Delete database operations used Database Context Class methods instead of regular SQL queries.
using TutorialLoginServerV2.Models.Entities;
using Microsoft.AspNetCore.Identity.EntityFrameworkCore;
using Microsoft.EntityFrameworkCore;

namespace TutorialLoginServerV2.Models
{
    public class MainDbContext : IdentityDbContext
    {
        public MainDbContext(DbContextOptions<MainDbContext> options) : base(options)
        {

        }

        public DbSet<PlayerUser> PlayerUsers { get; set; }
        public DbSet<Character> Characters { get; set; }
    }
}
Pay attention that our created MainDbContext derives from IdentityDbContext class, not from DbContext class.
It's because we using not the Entity Framework only, but the Entity Framework with the Identity system.
Simplified it looks like our "MainDbContext" derives from "IdentityDbContext" and then "IdentityDbContext" derives from "DbContext".
Just like the EngineManager, the MainDbContext class will be included into the dependency injection system.
Done.
#10 - Create Startup class and init database
- Create Startup class
Startup.cs class is a most important class in any of a asp.net core application. This class runs every time when our application starts and configure it.
In this class we load settings files, add services and configure it, register dependency injections for any of another classes, define MVC patterns and much more.
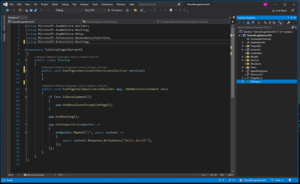
Now your Startup.cs seems like this:
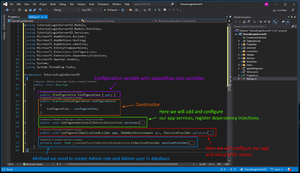
But we need to create here next points:
- Create the constructor where we load created in 8th episode appsettings.json file to the Configuration variable from the integrated, out of box, dependency injection system.
- Register, created in last episode, EngineManager as service in the dependency injection system.
- Register, created in last episode, MainDbContext as service in the dependency injection system. Actually register Entity Framework ORM system.
- Register, added in 7th episode as NuGet package, Identity system as service in the dependency injection system.
- Customize Identity system servece.
- Register Model View Controller application pattern (MVC for short) as service. Actually make this app as MVC.
- Register, added in 7th episode as NuGet package, Swagger as service.
- Activate Swagger.
- Activate Swagger UI (html page).
- Activate Developer Exception Page.
- Allow to use static files from the "wwwroot" folder.
- Activate Authentication.
- Activate Authorization.
- Define default MVC controllers routing. For example when we open http://example.com/account/register in our app will runs Register method in Account controller.
- Create specific method for creating admin role and admin user in database.
Short Startup.cs class:
Full Startup.cs class:
using TutorialLoginServerV2.Models;
using TutorialLoginServerV2.Models.Entities;
using TutorialLoginServerV2.Services;
using Microsoft.AspNetCore.Builder;
using Microsoft.AspNetCore.Hosting;
using Microsoft.AspNetCore.Identity;
using Microsoft.EntityFrameworkCore;
using Microsoft.Extensions.Configuration;
using Microsoft.Extensions.DependencyInjection;
using Microsoft.OpenApi.Models;
using System;
using System.Threading.Tasks;

namespace TutorialLoginServerV2
{
    public class Startup
    {
        public IConfiguration Configuration { get; }
        public Startup(IConfiguration configuration)
        {
            Configuration = configuration;
        }

        public void ConfigureServices(IServiceCollection services)
        {
            services.AddTransient<EngineManager>();
            services.AddDbContextPool<MainDbContext>(options => options.UseSqlServer(Configuration.GetSection("ConnectionStrings")["DefaultConnection"]));
            services.AddIdentity<PlayerUser, IdentityRole>().AddEntityFrameworkStores<MainDbContext>();

            services.Configure<IdentityOptions>(options =>
            {
                options.Password.RequiredLength = 6;
                options.Password.RequiredUniqueChars = 0;
                options.Password.RequireNonAlphanumeric = false;
                options.Password.RequireLowercase = false;
                options.Password.RequireUppercase = false;
                options.Password.RequireDigit = false;
                options.User.RequireUniqueEmail = true;
                options.SignIn.RequireConfirmedEmail = false;
            });

            services.AddMvc();

            services.AddSwaggerGen(c =>
            {
                c.SwaggerDoc("v1", new OpenApiInfo { Title = "Login Server", Version = "v2" });
            });

            services.AddControllers().AddNewtonsoftJson(options => options.SerializerSettings.ReferenceLoopHandling = Newtonsoft.Json.ReferenceLoopHandling.Ignore);
        }

        public void Configure(IApplicationBuilder app, IWebHostEnvironment env, IServiceProvider services)
        {
            app.UseSwagger();
            app.UseSwaggerUI(c => c.SwaggerEndpoint("/swagger/v1/swagger.json", "LoginServer v2"));


            app.UseDeveloperExceptionPage();
            app.UseStaticFiles();
            app.UseRouting();

            app.UseAuthentication();
            app.UseAuthorization();

            app.UseEndpoints(endpoints =>
            {
                endpoints.MapControllerRoute(
                    name: "default",
                    pattern: "{controller=Home}/{action=Index}");
            });

            //CreateDefaultAdminRoleAndAdminUser(services).Wait();
        }

        private async Task CreateDefaultAdminRoleAndAdminUser(IServiceProvider serviceProvider)
        {
            RoleManager<IdentityRole> RoleManager = serviceProvider.GetRequiredService<RoleManager<IdentityRole>>();
            UserManager<PlayerUser> UserManager = serviceProvider.GetRequiredService<UserManager<PlayerUser>>();

            string loginForNewAdmin = "Administrator";
            string emailForNewAdmin = "admin@mail.ru";
            string passForNewAdmin = "grefdsrthdfgrbd45";

            bool roleCheck = await RoleManager.RoleExistsAsync("Admin");
            if (!roleCheck)
            {
                await RoleManager.CreateAsync(new IdentityRole("Admin"));
            }

            PlayerUser userCheck = await UserManager.FindByEmailAsync(emailForNewAdmin);
            if (userCheck == null)
            {
                PlayerUser newAdminUser = new PlayerUser { UserName = loginForNewAdmin, Email = emailForNewAdmin };
                await UserManager.CreateAsync(newAdminUser, passForNewAdmin);
                await UserManager.AddToRoleAsync(newAdminUser, "Admin");
            }
        }
    }
}
Pattern: "{controller=Home}/{action=Index}"); will works next way, to open default website page, our app will try to find the "Home" controller and run the "Index" method inside of it.
In our case we created no "Home" controller and no "Index" method yet, so if we try to run application now, we will see "Error 404 page not found". It is Okay, we will create this classes in the next episodes.
- Database initialization
For now we created our application entity model classes like PlayerUser.cs and Character.cs.
We created Database Context Class MainDbContext.cs where we defined our database tables based on our entities.
We store the database connection string in the appsettings.json file and then loaded it in the Startup.cs file to the Configuration variable.
We also registered our MainDbContext.cs Database Context Class as our application service in the ConfigureServices method in the Startup class.
services.AddDbContextPool<MainDbContext>(options => options.UseSqlServer(Configuration.GetSection("ConnectionStrings")["DefaultConnection"]));
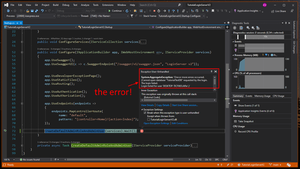
But inside of our Database Server our database have not created yet.
And, if we try to run some database methods we will se an error.
Lets try uncomment next row:
//CreateDefaultAdminRoleAndAdminUser(services).Wait();
And run our application..
As you can remember, in the previous episodes I told you, to create Database automatically, from our c-sharp model classes, we need to do some magical "migration" operation.
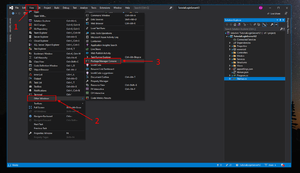
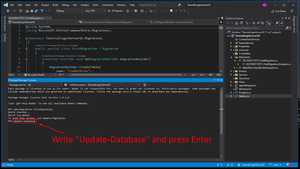
To do it, we need to open "Package Manager Console":
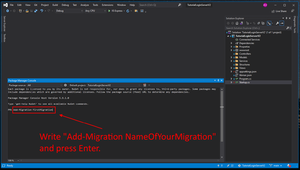
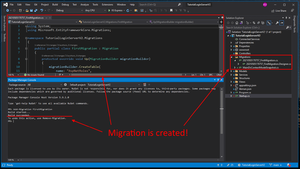
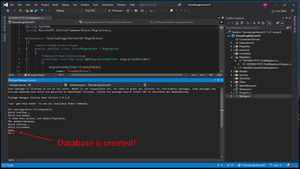
Then we need to make our first "Migration":
We can open SQL Server Management Studio and check new database:
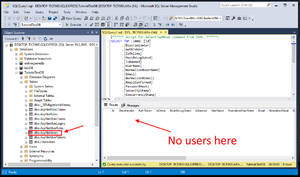
Let's see our PlayerUsers table:
Now we can uncomment next line one more time:
//CreateDefaultAdminRoleAndAdminUser(services).Wait();
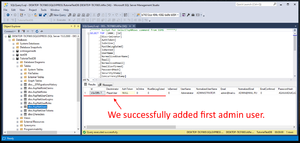
And run application one more time:
Application works!! Yes, we still can see "404 Error", but it must be. We have no exceptions, app works with database!
Lets check our PlayerUsers table one more time:
Done.
